Models
Models are ready-to-use, pre-trained machine learning models shared on Forest Stack. Users can download these models or test them directly on the platform to solve specific tasks like text classification, image recognition, or prediction.
Models Listing Page
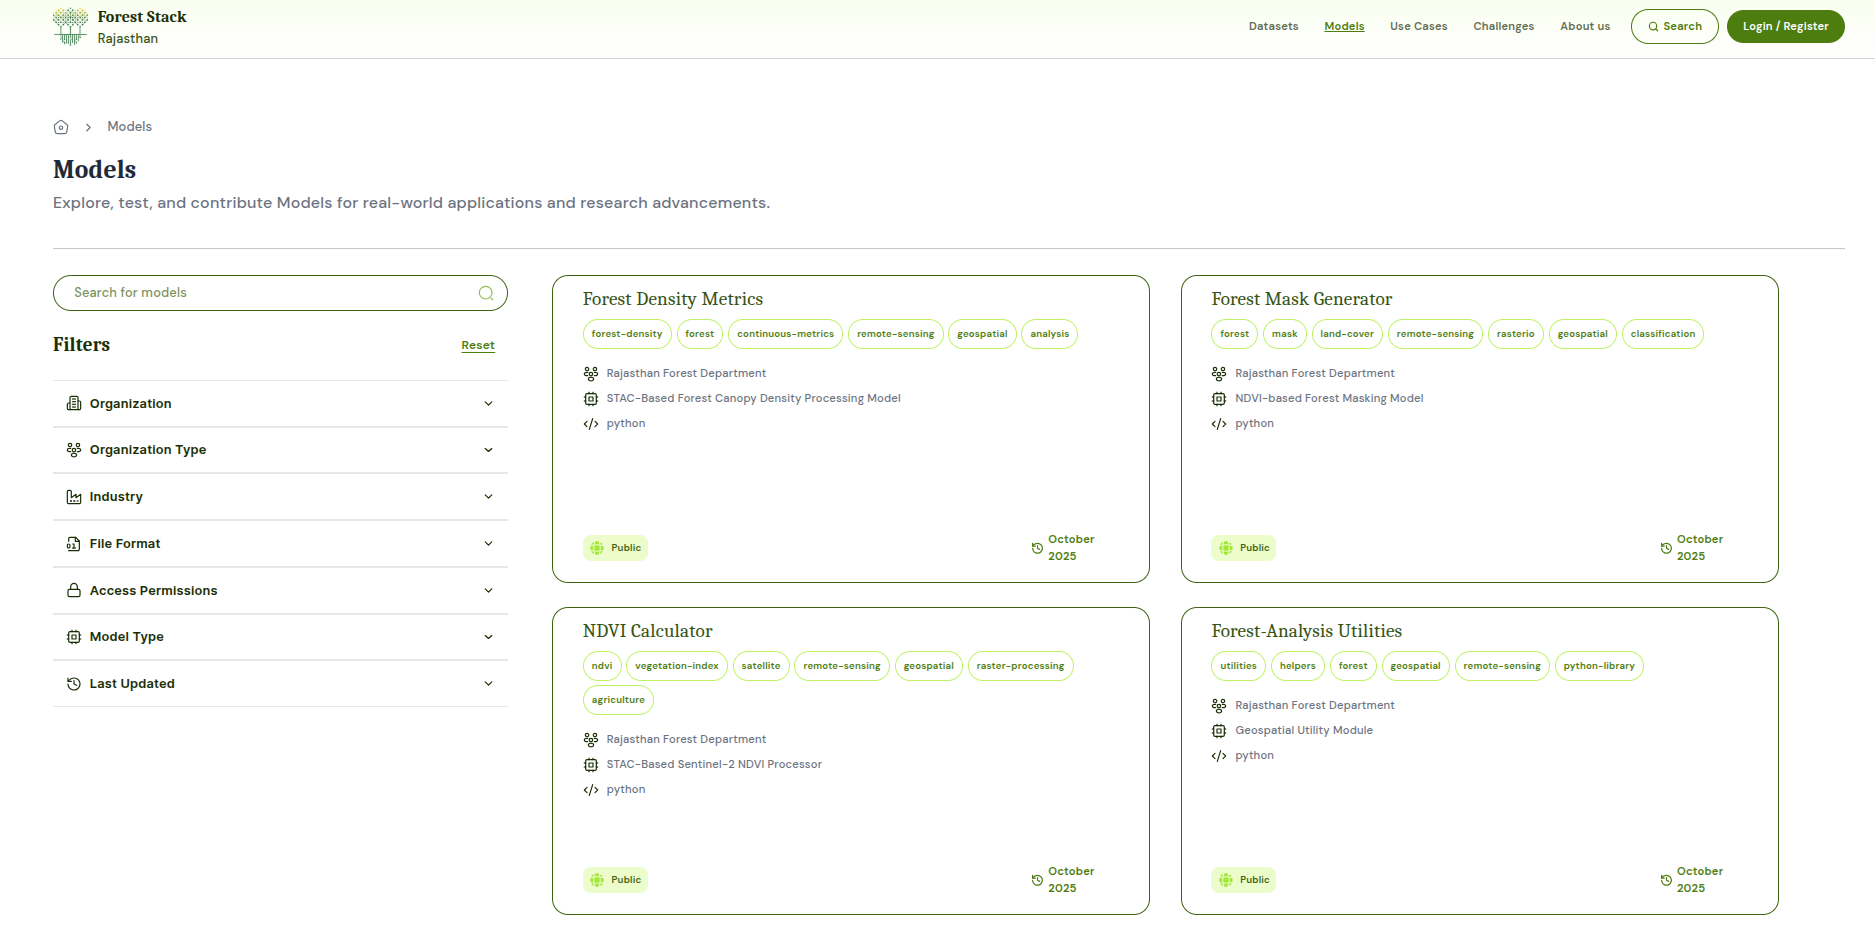
The Models Listing page provides a central hub for discovering, evaluating, and accessing pre-trained Models. Users can quickly locate the right model via the search bar, refine the list with sort and filter controls, and review key details on each model’s card before diving into model-specific documentation or testing environments.
 Models Listing Page
Models Search
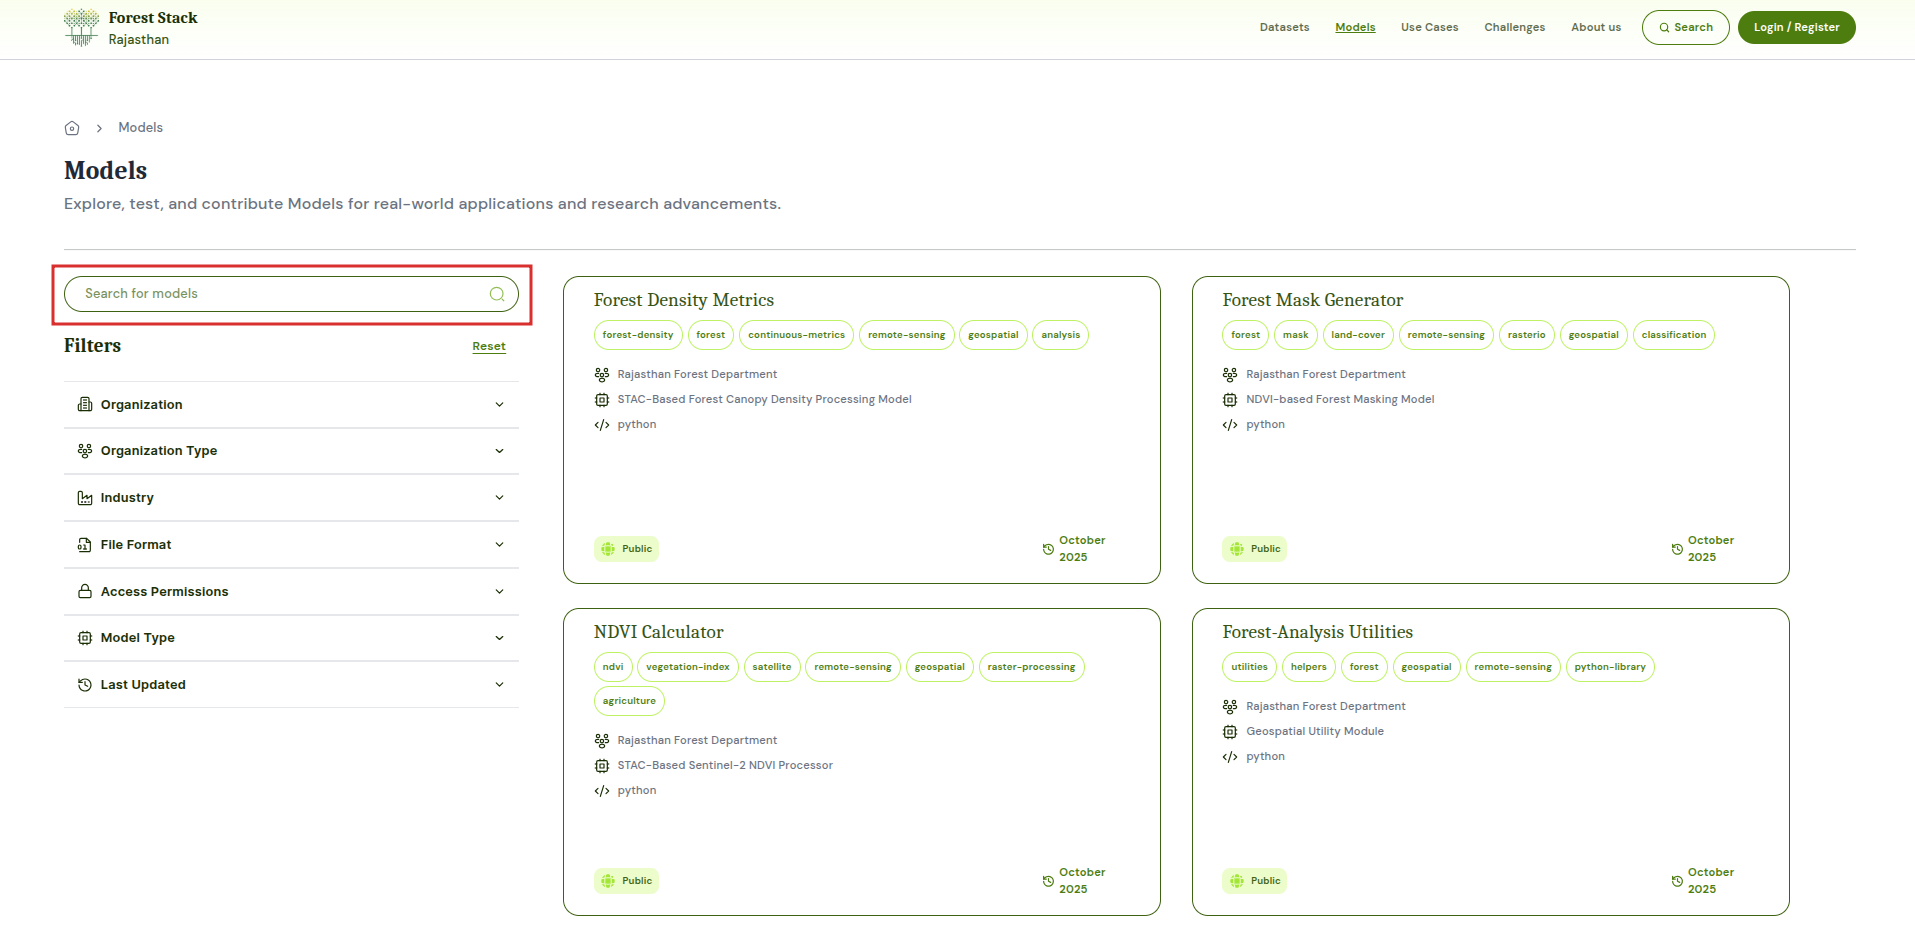
Positioned at the top of the page, the Models search bar lets users enter keywords (e.g., “translation,” “disease detection”) to instantly narrow the Models list.
 Models Search Bar
Filter Feature
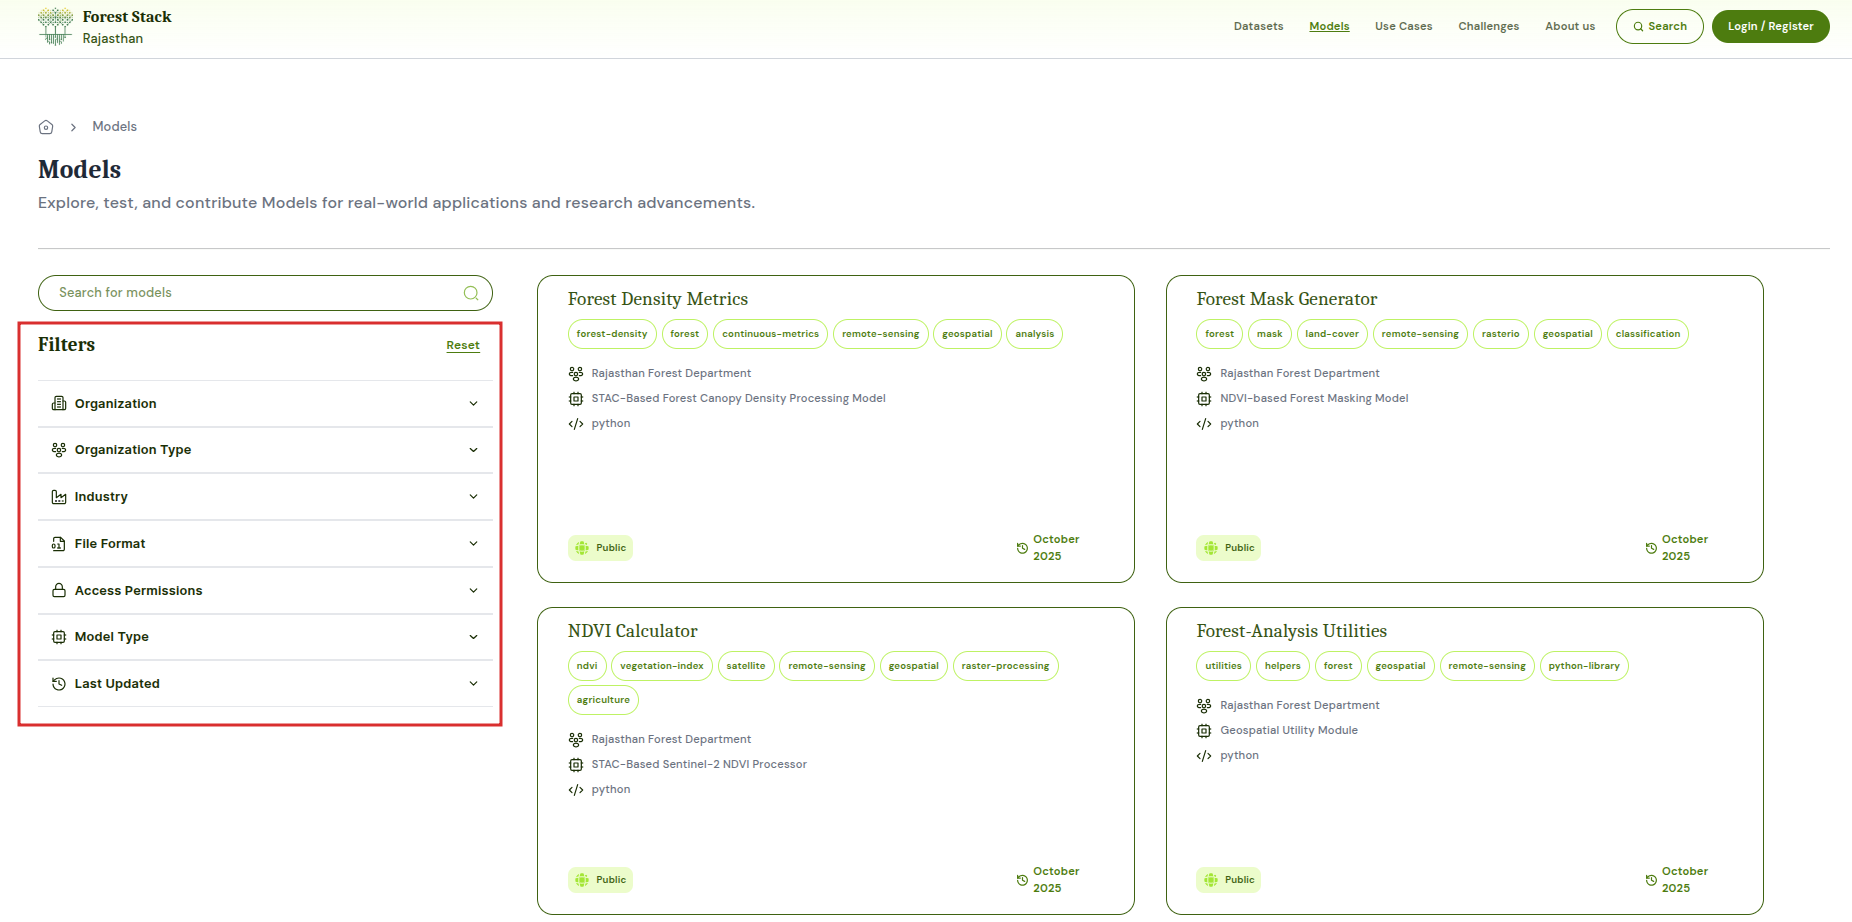
The Model filter panel enables users to narrow the model listing by multiple criteria:
- Organisation Type:
- All: Includes Models from every source.
- Public: Models published by government departments or publicly funded entities.
- Private: Models contributed by private companies or startups.
- Academic Institution: Models originating from universities and research institutes.
- Other: Models from NGOs, community groups, or any other type of Data Provider Entity.
- Industry: Applying an industry filter limits results to Models tagged under those sectors. Type to search or select one or more industries—such as Healthcare, Financial Services, Agriculture, Manufacturing, Energy, Education and more.
- Model Type: Model categories such as Text Classification, Image Classification, Object Detection, Named Entity Recognition, Speech-to-Text, Text Summarization, Sentiment Analysis, Time Series Forecasting, Clustering, Anomaly Detection, Recommendation, Language Translation, Question Answering, Text Generation, Semantic Search, and many more.
- File Format: This filter helps in listing Models with specific file formats
- Traditional ML: PKL, JOBLIB, SAV, RDS
- Deep Learning (TensorFlow / Keras): HDF5, PB, TFLITE, KERAS
- Deep Learning (PyTorch): PT, PTH, CKPT
- Cross-Framework / Optimized: ONNX, SAFETENSORS, TRT
- Enterprise/Interchange: MLMODEL, TFLITE, PMML, JSON, BIN
- Other
- Permission:
- Open: Publicly available Models with immediate download access.
- Restricted: Models requiring approval or elevated permissions to download.
- Last Updated: Restrict results to Models updated in last 7 days, last 30 days, last 1 year or within a custom date range.
 Models Filter options
Model Card
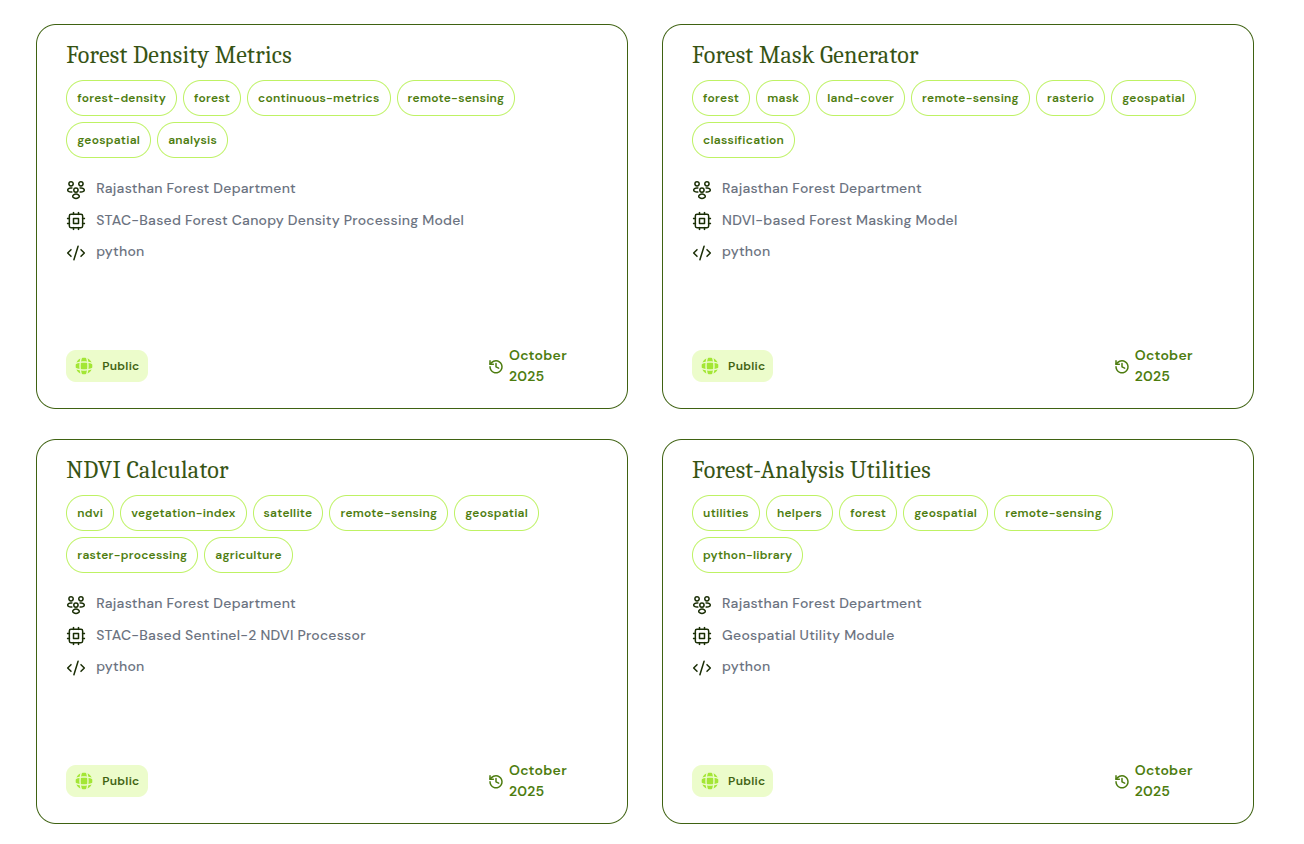
Each model card provides a snapshot of the following key information:
- Title
- Tags
- Publishing Data Provider Entity
- Model Type
- Programming Language
- Last updated date
- Access Status - "Open" or "Restricted" badge
 Model Cards
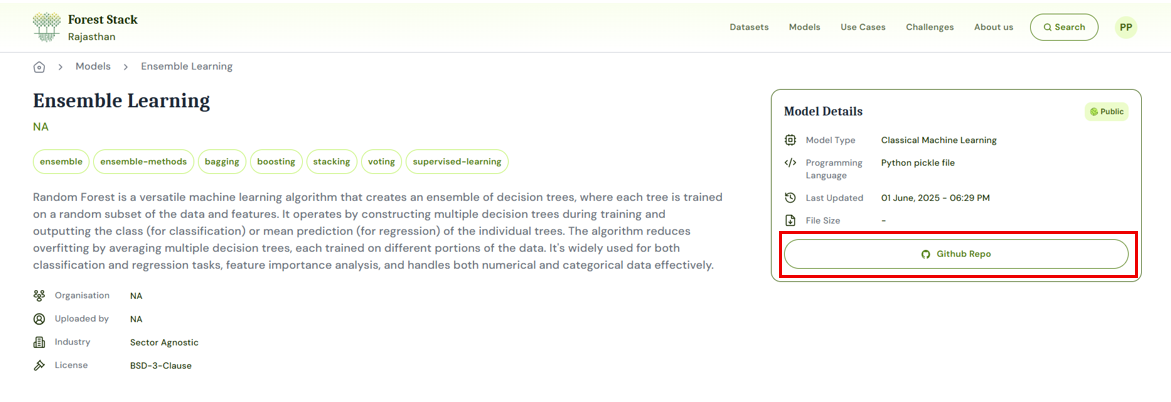
Model Details
When users select a Model card, they arrive at the Model Detail page, which is organized into the following sections:
Page Header & Actions
- Breadcrumb Trail: Shows “Home / Models / [Model Name]” so users know their location.
- Model Title & Permission: The model’s name (e.g., “Forest Density Metrics”) is accompanied by an Open or Restricted badge.
- Download Button: For Open models, users can immediately download the model archive; for Restricted models, this button becomes active once access is granted.
Description
- A concise summary describing the model's purpose, key capabilities.
Tags
- Keywords (e.g., "Grievance," "Classification") that show the model's domains and functions.
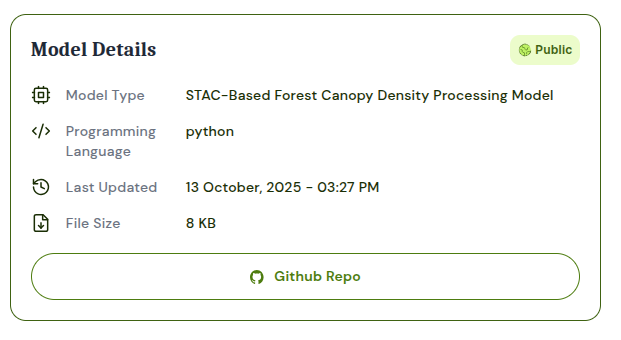
Model Details Panel
A structured metadata table presents:
Organization: The government department, agency or entity that has the ownership of the published Model.
Uploaded By: The individual or team (and their organisation) that submitted the model to Forest Stack.
Industry: The sector classification—such as Public Services, Healthcare or Agriculture—that indicates the model’s primary domain, if any. If model is not associated to any industry, it is depicted as sector agnostic
License: Governing usage terms (e.g., Apache 2.0).
Model Permission: Access level (Public or Restricted).
Model Type: Task category (e.g., Text Classification)
Programming Language: Programming Language of the model (e.g., Python)
Last Updated: Last updated date of the model
File Size: Download size of complete model repository
Github Repo: Link to redirect to models github repo
 Models detail page
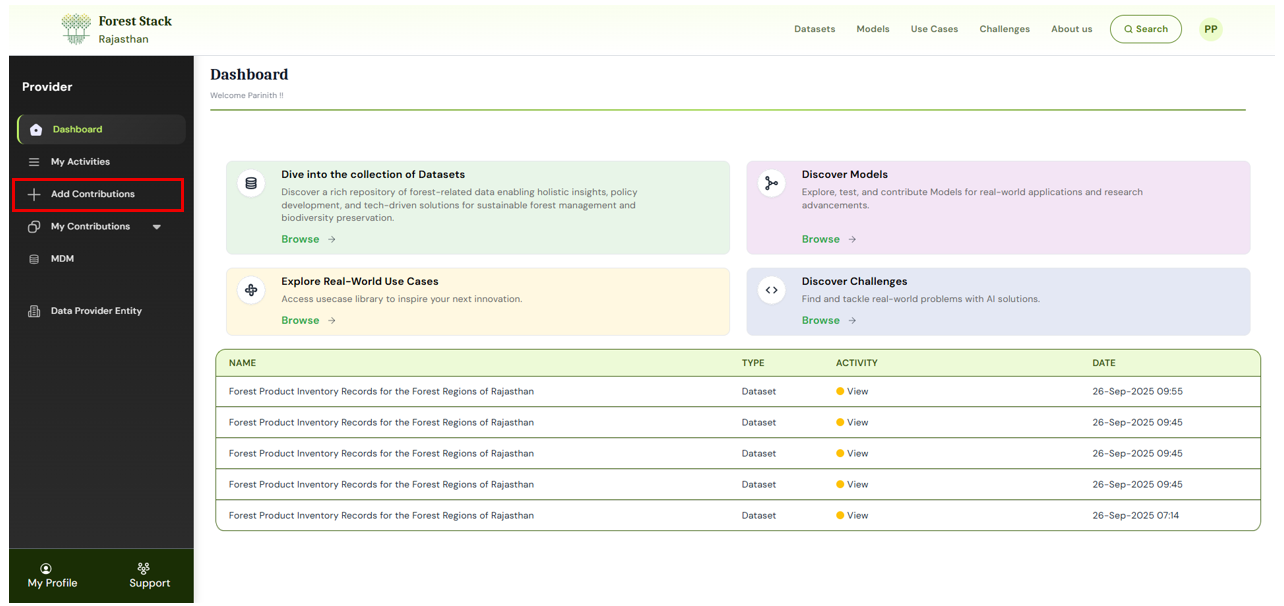
Model Upload
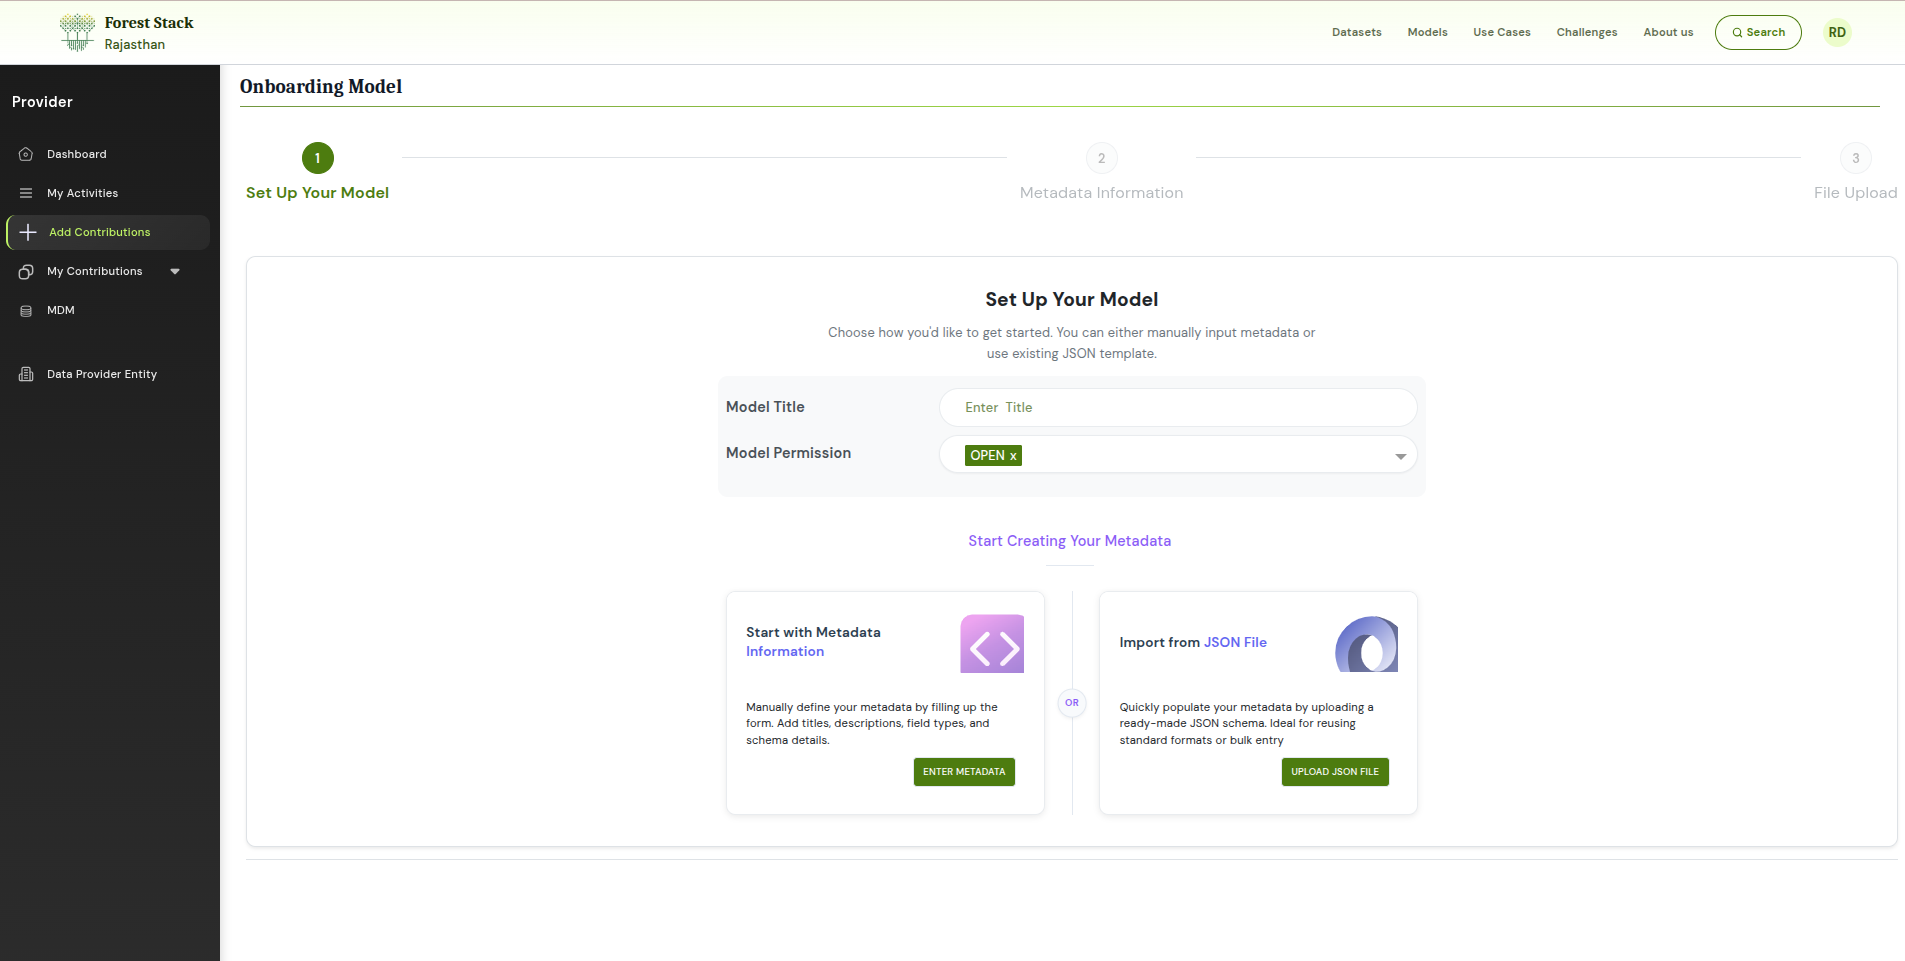
Step 1: Click on ‘Start adding Model’ and then, set up your Model.
- Model Title: Enter a concise, descriptive name that clearly reflects the model's function (e.g., "Forest Density Metrics")
- Model Permission:
- Open: The model is publicly accessible—any user can download or invoke it immediately without approval.
- Restricted: Access requires approval from the publisher of that particular Model.
- Metadata Entry Options:
- Enter Metadata Manually: Opens a form where you have to fill short/long descriptions, tags and structured fields from scratch.
- Import from JSON: Upload an existing Forest Stack-compatible JSON manifest to pre-populate all metadata fields—ideal for automated workflows or bulk model registrations.
 Clicking on 'Start adding Model'
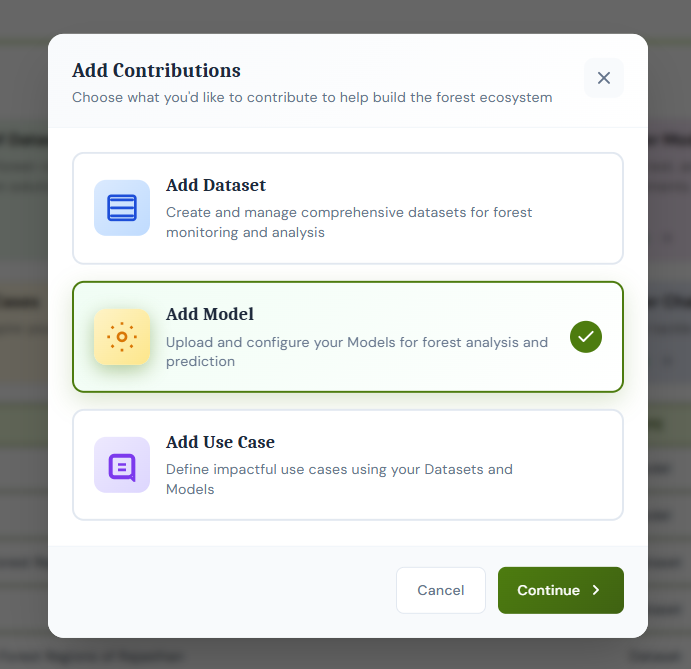 Add Model
 Add Model title and Permission
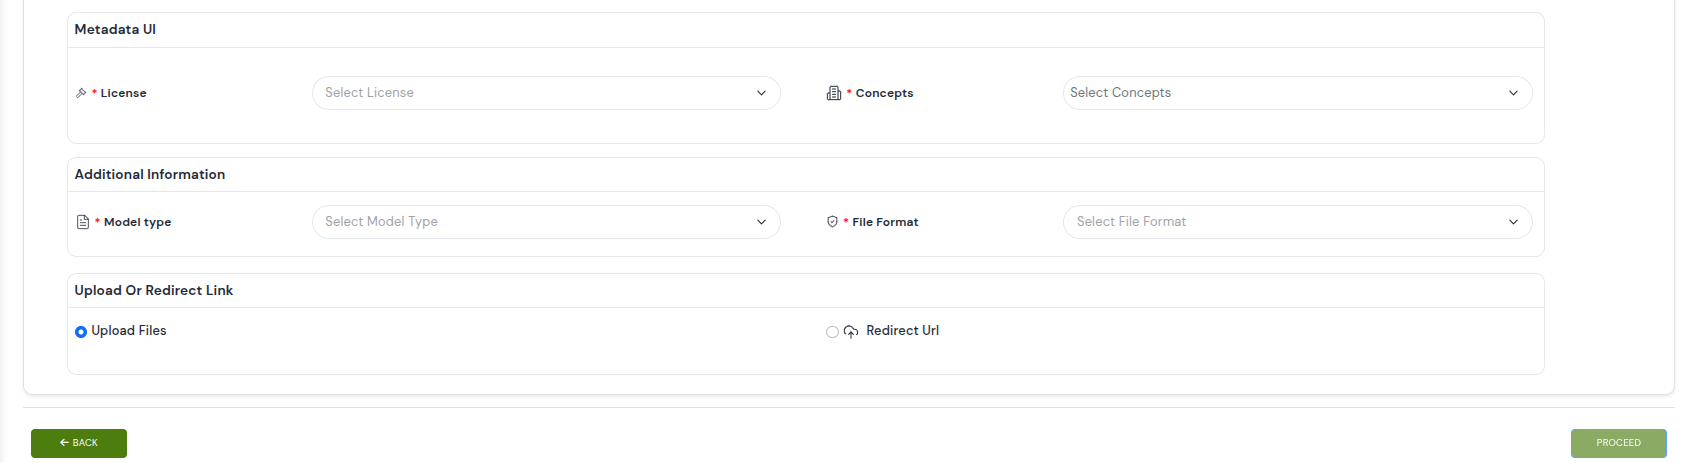
Step 2: Provide Model Information
Once the basic setup is complete, fill in the model’s descriptive and structured metadata:
- Model Title: Title of the model
- Model Permission: Access level of the model.(e.g.: OPEN or Restricted)
- Short Description: A One- or two-sentence summary of the model's task and capabilities
- Tags: Add up to five keywords that aid discovery (e.g., “Text Classification,” “NLP,” “Grievance”).
- Long Description: In the long description, users should clearly explain what the model is meant to do, what kind of input it takes and what output it gives. They should also mention key features like support for different languages, the ability to customize outputs. Finally, it’s helpful to describe how the model can be used or where it can be applied.
- License: Legal terms governing reuse.
- Concepts: Predefined domain categories used to classify your dataset into broader thematic areas for easier browsing.Choose appropriate from the drop down.
- Model Type: AI task category (Text Classification, Object Detection, etc.)
- File Format: Bundle format(s) supported (SAFETENSORS, ONNX, PKL, etc.)
- Upload or Redirect Link: Choose upload files or choose redirect url and paster the url.

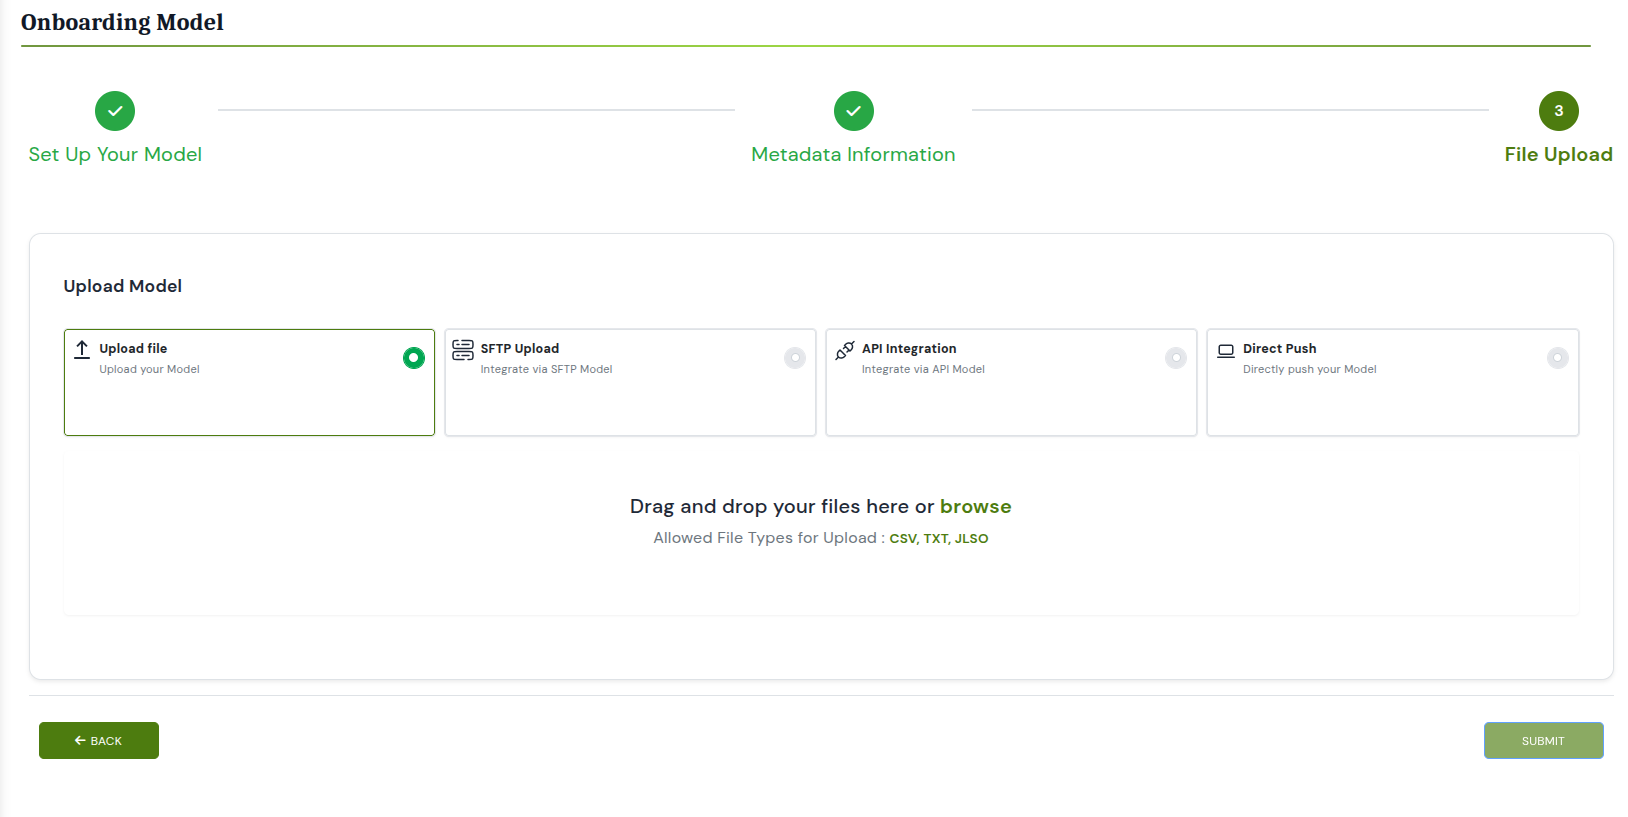
Step 3: Upload Your Model
If the user provides a Media URL, the Model will be created automatically in Step 2. However, if no Media URL is entered, the user will be directed to Step 3 to proceed with manual file upload. In this step, users must upload the relevant files according to the file format selected in Step 2. They have the option to upload multiple files using the "Upload More" button. Additionally, users can clear or delete any previously uploaded files and upload new files or an entirely new set using the Clear All button.
 Need to upload the IMAGE
Step 4: Review and Publish
Before publishing, review all details including the short and long descriptions, tags, metadata fields, and uploaded files to ensure accuracy. Confirm that the correct permission level is selected. Once everything is verified, click Publish to proceed.Open Models go live immediately and are discoverable by all users.
Step 5: Approval
Approval requests are sent to the Organisation Manager for review. Once they approve, the Model gets published on the Model listing page.
Model Download
- Open: For 'Open' Models, users can simply click the Download button on the model detail page. The model file is immediately packaged and begins downloading without any additional steps or approvals.
- Restricted: For 'Restricted' Models, users must first request access by clicking the Request Access button on the detail page. A form will appear prompting the user to provide a brief justification. Once submitted, the request is sent to the model's publisher or organisation manager for approval. After approval, the user receives an email notification and the Download button becomes active on the detail page, allowing them to retrieve the model file.
 Model Download